Pick N Pluck
Pick N Pluck Foam
Customize Your Pelican Air Case
The Pick’N’Pluck Foam Insert is by far the easiest and most often used method to create the perfect customized insert for your case.
These pre-scored pluck foam pieces come in different layer thicknesses. Depending on the size of the case there may be anywhere from one to six or seven foam layers in a case.
These pre-scored pluck foam pieces come in different layer thicknesses. Depending on the size of the case there may be anywhere from one to six or seven foam layers in a case.

Step 1 – Lay It Out:
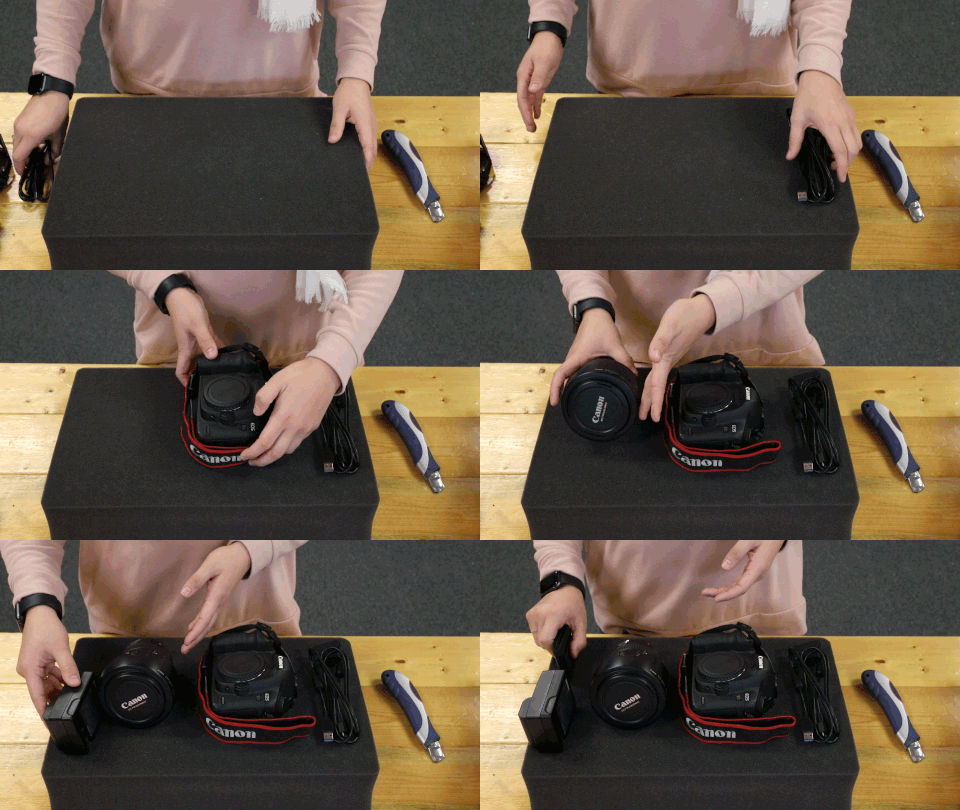
Decide the best layout for your items. Depending on how fragile each of the individual pieces are - try and leave at least 1” between each piece. For delicate pieces 1 ½” -2” is advisable. Consider creating a catch-all cutout for things like wires or clips to save on space.

Step 2 – Trace It
Using a sharpie or even chalk (some people use toothpicks), trace your equipment making sure you leave enough space between each piece. Any fragile pieces should be placed away from the sides.

Step 3 – Pluck It
Remove your items and begin manually plucking the pieces inside the traced areas. If you're feeling really fancy you can use an Exacto knife type blade to cut more exact shapes & contours.
Since most items aren't flat, you'll probably want to cut the pieces to various depths to better fit but that is up to you.
After you are done plucking the foam, use the removed foam to lay back down so that the height of your items will sit almost flush to the top of the foam piece.

Step 4 – Place Items Back
Once you are done with the foam removal and leveling, place your items back into the foam and adjust as needed. A snug fit is the best fit. You don't want your items to be moving around during transit. To remove the residual chalk lines, wipe away with a damp cloth.
And that's it! Easy peasy.
Air Cases with Pick N Pluck Foam
Up to 40% lighter than other polymer cases, Pelican™ Air cases will lighten the loads of the dedicated pros around the world who have set out to change the game.
The Pick’N’Pluck Foam Insert is by far the easiest and most often used method to create the perfect customized insert for your case.
These pre-scored pluck foam pieces come in different layer thicknesses. Depending on the size of the case there may be anywhere from one to six or seven foam layers in a case.
These pre-scored pluck foam pieces come in different layer thicknesses. Depending on the size of the case there may be anywhere from one to six or seven foam layers in a case.

Step 1 – Lay It Out:
Decide the best layout for your items. Depending on how fragile each of the individual pieces are - try and leave at least 1” between each piece. For delicate pieces 1 ½” -2” is advisable. Consider creating a catch-all cutout for things like wires or clips to save on space.

Step 2 – Trace It
Using a sharpie or even chalk (some people use toothpicks), trace your equipment making sure you leave enough space between each piece. Any fragile pieces should be placed away from the sides.

Step 3 – Pluck It
Remove your items and begin manually plucking the pieces inside the traced areas. If you're feeling really fancy you can use an Exacto knife type blade to cut more exact shapes & contours.
Since most items aren't flat, you'll probably want to cut the pieces to various depths to better fit but that is up to you.
After you are done plucking the foam, use the removed foam to lay back down so that the height of your items will sit almost flush to the top of the foam piece.

Step 4 – Place Items Back
Once you are done with the foam removal and leveling, place your items back into the foam and adjust as needed. A snug fit is the best fit. You don't want your items to be moving around during transit. To remove the residual chalk lines, wipe away with a damp cloth.
And that's it! Easy peasy.
Air Cases with Pick N Pluck Foam
Up to 40% lighter than other polymer cases, Pelican™ Air cases will lighten the loads of the dedicated pros around the world who have set out to change the game.
